

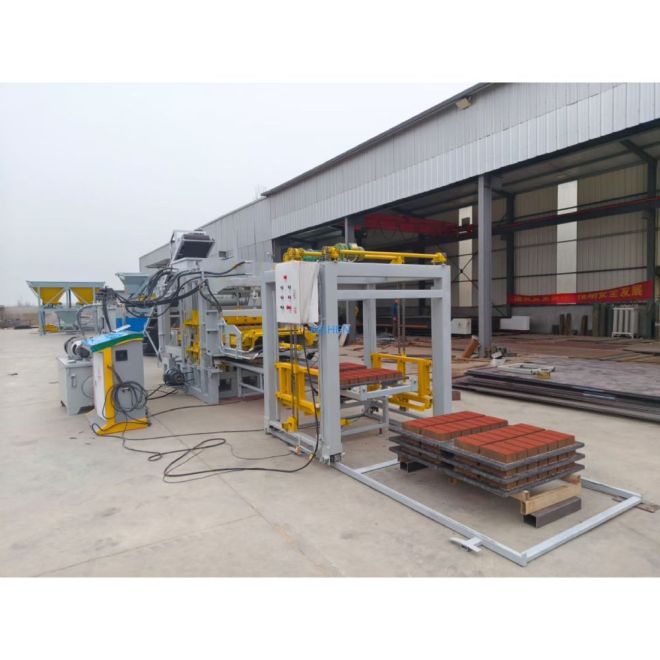
Your automatic concrete block machine squeaks, jams, and throws tantrums like it’s on strike, and you’re stuck wondering if it needs a mechanic, a priest, or just a very long vacation.
Relax—simple, regular maintenance keeps it running smoothly. Follow the lubrication schedule, clean moving parts, and inspect wear areas using guides like this OSHA equipment maintenance report to prevent costly breakdowns and downtime.
🔧 Daily Inspection Checklist for Automatic Concrete Block Machines
Daily checks keep your automatic concrete block machine stable, safe, and productive. A quick 10-minute routine helps avoid sudden breakdowns and costly downtime.
Use this checklist before every shift to spot leaks, loose parts, and vibration problems. Record results so technicians can track wear over time.
1. Visual and Safety Inspection
Walk around the machine and confirm shields, emergency stops, and warning labels are in place and clean.
- Check for oil, water, or hydraulic leaks
- Confirm no loose bolts or cracked hoses
- Test emergency stop buttons
2. Hydraulic and Pneumatic Systems
Inspect pressure gauges and listen for air leaks. Stable pressure means smooth molding and vibration cycles.
| Item | Check |
|---|---|
| Hydraulic oil level | Within marked range |
| Hoses | No swelling or cracks |
| Air lines | No hissing or loose joints |
3. Electrical and Control Panel
Keep the control cabinet dry and clean for safe, accurate running of your automatic block line.
- Check cables for cuts or burn marks
- Confirm fans and filters are not blocked
- Back up PLC parameters regularly
4. Vibration Table, Molds, and Pallets
Inspect contact surfaces to ensure blocks stay uniform and machines like the QT3-20 automatic block machine concrete block automatic machine work at peak speed.
- Check mold cavities for cracks or dents
- Verify pallet thickness and flatness
- Look for loose vibration bolts
🛢️ Lubrication Points and Recommended Service Intervals for Moving Components
Correct lubrication extends machine life and prevents severe wear on bearings, chains, and guides. Always follow the oil and grease grades in your manual.
Plan a fixed schedule and log each service. This simple habit reduces downtime and supports consistent block quality in both new and older plants.
1. Daily Lubrication Points
Grease high-load parts that move constantly, such as vibration bearings and mold guide columns.
- Apply grease to guide posts at the start of each shift
- Lubricate vibration bearings after cleaning dust
- Check oilers for proper flow
2. Weekly and Monthly Intervals
Plan weekly chain lubrication and monthly gearbox checks, similar to schedules used on the QT4-25C automatic paver machine block making machine suppliers production lines.
| Component | Interval |
|---|---|
| Conveyor chains | Weekly |
| Gearboxes | Monthly |
| Hydraulic cylinder pins | Monthly |
3. Oil Quality and Contamination Control
Dirty oil quickly destroys pumps and valves. Keep drums closed and always filter oil when filling tanks.
- Use clean funnels and strainers
- Replace filters at the set hours
- Check oil color and smell for signs of overheating
4. Lubrication Performance Overview (Bar Chart)
Use simple data tracking to compare breakdowns before and after better lubrication. The chart below is an example of how failures can drop.
🧹 Cleaning Procedures to Prevent Concrete Buildup and Corrosion
Regular cleaning removes wet concrete, dust, and chemicals that attack steel and shorten machine life in harsh sites.
Focus on high-splash areas like hoppers, mold zones, and conveyors. Always lock out power before manual cleaning work.
1. End-of-Shift Cleaning Routine
Clean the machine at the end of every shift while concrete is still soft and easy to remove.
- Scrape fresh concrete from molds and feeders
- Use low-pressure water; avoid soaking electrical parts
- Dry exposed metal and re-grease quickly
2. Weekly Deep Cleaning
Perform deeper cleaning on hard-to-reach areas and structural parts to prevent hidden corrosion.
| Area | Method |
|---|---|
| Under vibration table | Brush and vacuum |
| Conveyor frames | Scrape, then wipe with oil |
| Control cabinet | Dry wipe only |
3. Corrosion Protection
After cleaning, always protect exposed metal, especially in coastal or humid sites.
- Spray anti-rust oil on bare steel
- Touch up damaged paint
- Check anchor bolts for rust and tightness
📏 Calibration and Alignment Steps for Molds, Pallets, and Feed Systems
Correct alignment keeps block sizes uniform and prevents stress on structure and hydraulics.
Calibrate molds, pallets, and feed systems after major repairs, relocations, or mold changes to maintain steady production.
1. Mold Height and Parallelism
Check that mold and tamper head are level and parallel to avoid uneven block heights.
- Measure block height at four corners
- Adjust shims or screws to correct gaps
- Recheck after a short test run
2. Pallet Track and Positioning
Proper pallet tracking protects bearings and ensures smooth feeding, as in a new QT3-20 block machine factory concrete block plant for sale.
| Item | Check |
|---|---|
| Rail straightness | Use string line or laser |
| Stop position | Pallet centered under mold |
| Rollers | Spin freely, no noise |
3. Feed Box Travel and Material Distribution
The feed box must move freely and spread mix evenly into each cavity.
- Check travel speed and stroke length
- Adjust scrapers for even fill
- Run test blocks and inspect density across the mold
🏭 When to Upgrade Worn Parts and Why Choose Aichen Replacements
Replacing worn parts on time prevents bigger failures and protects your investment in automatic concrete block equipment.
Good spares improve accuracy, reduce scrap, and keep your plant competitive in demanding markets.
1. Signs That Parts Need Replacement
Watch for noise, vibration, and poor block finish, which can signal serious wear or fatigue.
- Cracked or rounded mold edges
- Slow or jerky cylinder motion
- Rising oil temperature and leaks
2. Benefits of Genuine Aichen Parts
Aichen parts match the original machine design, ensuring fit, hardness, and long service in heavy-duty cycles.
| Feature | Benefit |
|---|---|
| Correct steel grade | Longer mold life |
| Accurate machining | Better block tolerance |
| Factory testing | Lower risk of failure |
3. Planning a Preventive Replacement Schedule
Create a yearly plan to replace high-wear parts before they fail during peak orders.
- Track hours on molds, bearings, and hoses
- Order spares in advance
- Schedule changes during low production
Conclusion
Strong maintenance habits keep your automatic concrete block machine safe, stable, and profitable. Daily checks, smart lubrication, and regular cleaning stop most failures before they grow serious.
Combine clear records, proper calibration, and timely part upgrades to protect your equipment. This approach supports high block quality and steady output in every season.
Frequently Asked Questions about Fully Automatic Concrete Block Machine
1. How often should I service my automatic concrete block machine?
Perform daily checks, weekly cleaning and lubrication, and a full inspection every three to six months, depending on hours, dust levels, and production load.
2. What causes uneven block height or cracks?
Common reasons include worn molds, poor alignment, unstable mix moisture, and incorrect vibration settings. Check mold condition and calibration before changing the mix.
3. Which parts wear fastest on an automatic block line?
Molds, vibration bearings, guide columns, conveyors, and hydraulic hoses usually wear first. Monitor them closely and keep critical spares in stock.
4. Can I reduce downtime with better lubrication?
Yes. A clear lubrication plan and clean oil often cut breakdowns sharply, protect pumps and bearings, and extend the service life of key components.
5. When is it time to upgrade my machine or add new molds?
If quality drops, scrap rises, or demand grows beyond capacity, consider new molds, automation upgrades, or a higher-output model to stay competitive.


